Meet the Flutter Widget Previewer: A New Era for UI Development
If you've ever felt the pain of navigating through five different screens just to check if a specific button's padding is correct, you are going to love this.
With the release of Flutter 3.38, the Flutter Widget Previewer has officially leveled up. It's an experimental tool that allows you to render and interact with individual widgets in real-time, completely isolated from your main app.
Think of it as a "component workbench" living right inside your IDE. No simulators, no emulators, just your widget, rendering instantly.
Here is everything you need to know to start using it today.
1. Getting Started: Zero Config Needed
The best part about the Widget Previewer in Flutter 3.38? It’s just there.
If you are using Android Studio, IntelliJ, or VS Code, the previewer now starts automatically when you launch your project. You don't need to mess with command-line arguments or obscure flags. Just look for the "Flutter Widget Preview" tab in your sidebar, and you're ready to go.
(Prefer the terminal? You can still run flutter widget-preview start to launch the environment in a Chrome browser window.)
Prerequisites:
- Flutter SDK: 3.38 or higher for IDE integration (3.35+ for CLI only).
- Status: Experimental (so expect some API changes in future updates!).
Android Studio and Intellij
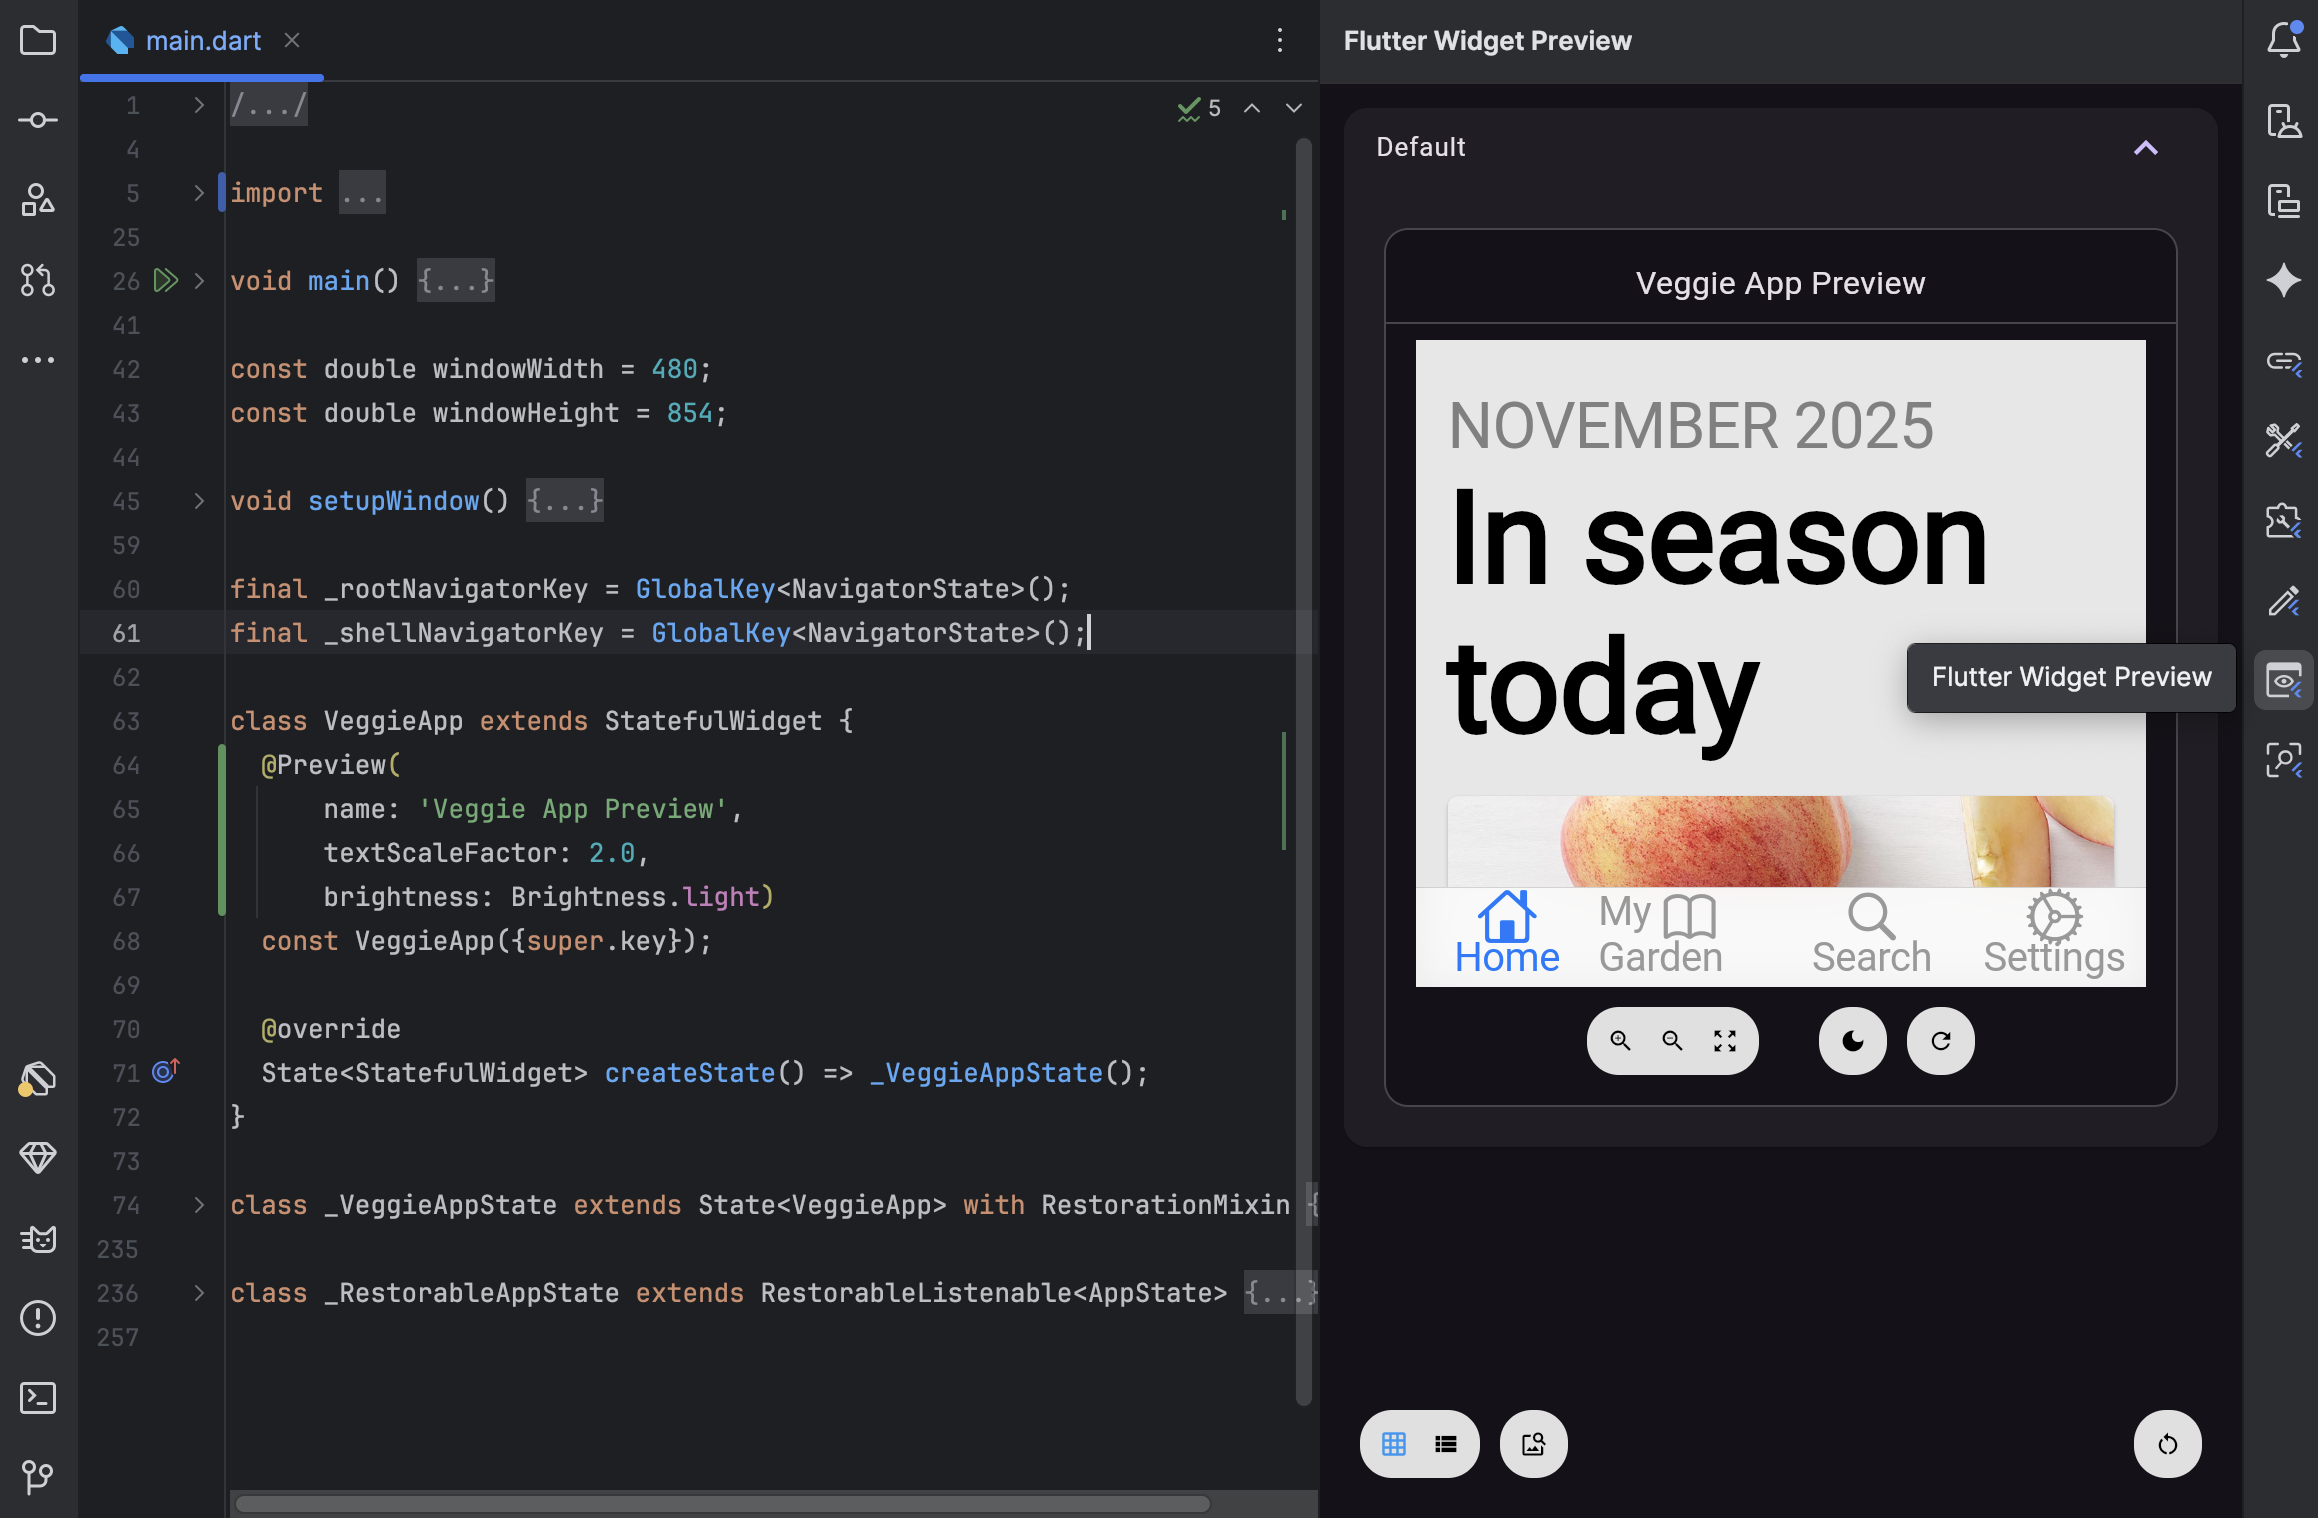
To open the Widget Previewer in Android Studio or Intellij, open the "Flutter Widget Preview" tab in the sidebar:
Visual Studio Code
To open the Widget Previewer in Visual Studio Code, open the "Flutter Widget Preview" tab in the sidebar:

2. How to Create Your First Preview
To preview a widget, you simply need to tell Flutter which one you want to see. This is done using the @Preview annotation from the package:flutter/widget_previews.dart package.
You can apply this annotation to:
- Top-level functions.
- Static methods.
- Public constructors (with no required arguments).
The "Hello World" Example:
Dart
import 'package:flutter/material.dart';
import 'package:flutter/widget_previews.dart';

@Preview(name: 'Primary Button')
Widget previewMyButton() {
  return ElevatedButton(
    onPressed: () {},
    child: const Text('Click Me'),
  );
}
Once you save this file, the preview will appear instantly in your IDE's preview tab.
3. Powerful Features & Controls
The previewer isn't just a static screenshot; it's a live, interactive environment.
- Hot Restart per Widget: Each preview has its own "Hot Restart" button. Tweak a color, hit the button, and only that widget reloads. It’s incredibly fast.
- Theme Toggling: Instantly switch your widget between Light and Dark modes to ensure your design holds up in both.
- Zoom Controls: Pixel-peep your designs with built-in zoom tools.
- Smart Filtering: By default, the IDE tab filters previews to show only the ones in the file you are currently editing. (You can toggle this off if you want to see everything at once).
4. Advanced Customization
Real-world widgets rarely live in a vacuum. They need data, themes, and specific sizes. The @Preview annotation has you covered.
Customizing the Environment: You can pass parameters to simulate different conditions:
size:Force a specific width/height (great for testing responsiveness).textScaleFactor:See how your UI breaks (or doesn't!) with large accessibility fonts.wrapper:Wrap your widget in a provider or specific parent (like aScaffoldorCenter).
Dart
@Preview(
  name: 'Large Font Card',
  textScaleFactor: 2.0,
  size: Size(300, 100),
)
Widget previewCard() => const MyInfoCard();
Multiple Previews for One Widget: Want to see the same widget in multiple states simultaneously? Just stack the annotations!
Dart
@Preview(name: 'Default', group: 'Buttons')
@Preview(name: 'Dark Mode', brightness: Brightness.dark, group: 'Buttons')
Widget previewButton() => const MyButton();
Note the group parameter—this keeps your preview panel organized.
5. Pro Tip: Reduce Boilerplate with MultiPreview
Typing out @Preview five times for every widget is tedious. In Flutter 3.38, you can create Custom Annotations.
Let's say you always want to test your widgets in both Light and Dark modes. You can create a reusable @DevicePreviews annotation by extending MultiPreview:
Dart
final class DevicePreviews extends MultiPreview {
  const DevicePreviews();

  @override
  List<Preview> get previews => const [
    Preview(name: 'Light Mode', brightness: Brightness.light),
    Preview(name: 'Dark Mode', brightness: Brightness.dark),
  ];
}

// Now use it everywhere!
@DevicePreviews()
Widget myWidget() => const MyWidget();
This is a massive productivity booster for design systems.
6. Important Limitations (The "Gotchas")
Since the previewer runs on a web-based engine (even inside your IDE), there are a few restrictions to keep in mind:
- No Native Code: APIs from
dart:io(likeFile) ordart:ffiwill not work. If your widget relies on these, you'll need to mock them or use conditional imports. - Asset Paths: You must use package-based paths for assets (e.g.,
packages/my_app/assets/logo.png) instead of relative paths. - Public Constants: Any callback arguments you pass to the
@Previewannotation must be public and constant (static).
Final Thoughts
The Flutter Widget Previewer is transforming how we build UIs. It encourages a "component-driven" workflow, where you build small, isolated, and robust widgets before assembling them into complex screens.
If you haven't tried it yet, open up your project, upgrade to 3.38, and give it a spin. You might never go back to running the full simulator just to check a hex code again.